Tuesday, March 31, 2009

Malin's Mini Blog Candy


Hi there,

I came across this offer of Mini Blog Candy from Malin and thought I would share it with you.

Aren't these little characters so cute ?

To be in the running for this offer, check out Malin's site and leave a comment for her with a link on your blog but be very quick as the offer finishes tonight 31st March.

Thanks for stopping by - come back again soon!

Saturday, March 28, 2009

Demo's Day Out !

Hi everyone,

Well today I had a wonderful day out with some of my team members.
Jenni Oliver invited us to her house for a get-together and we had a fantastic day.

The weather was warm & sunny - just perfect for the drive to the beautiful town of Gisborne here in Victoria where Jenni lives. I picked up my friend Debbie and we drove up to Jenni's together where we met up with Yvonne (our upline) and other members of our team and also some girls from Jenni's team.

We spent a lovely day together talking excitedly about what we were all going to order from the new catalogue as we already have ours - we're all going to be broke in the next month or so judging by the number of items on our Wish Lists !! LOL

As we have been able to pre-order some of the new stamps, inks and other items, some of the girls had brought along the new stamp sets to share them around for some stamping fun !

We had a great time playing with them and bouncing ideas off each other for cards we were going to make when we got home. Jenni then treated us to a beautiful BBQ lunch and we had all brought along some sweet goodies to share for dessert so a good time was had by all.

For a special treat (and to get us into training for Convention at the end of April) we all made cards /items to swap with each other - there were some fabulous ideas there and we all went home loaded with inspiration !!

Here is the card I made for the swap - I used one of the new stamp sets so here's a SNEAK PEEK at what you'll find in the new catalogue which will be available from 1st April.


For this card I used the Fresh Cuts stamp set with the Kiwi Kiss ink and the new Baja Breeze and Kiwi Kiss cardstock. The strip of blue paper is from one of the new Designer Series sets and these colours just blend together perfectly!

I added a bit of glitter to the leaves and to the flower centres to give the card that little something extra ! I managed to make quite a few of these cards over two nights so have a few extra ones to put away for that unexpected occasion when I need a card in a hurry and don't have the time to sit down and make one! Will have to get into the habit of making one or two extra of each card I make from now on so that I can build up a stockpile.

Well I hope you like this card - it's a SNEAK PEEK at some of the lovely things in our new catalogue so if you want to be one of the first to receive one of these new catalogues, contact me now and I'll send one out to you.

They are $12.95 a copy and I already have a box full so what are you waiting for ? Call me now to see what great products I'll be using in my upcoming classes !


Well, that's it for another day - must get to bed or I'll turn into a pumpkin - it's well past midnight and I really should be asleep.


See you all again soon - thanks for looking in :-)

Magnolia Down Under Challenge # 4


Hello again,


I was out all day today but managed to make this card for my entry in Kellie Winnell's Magnolia Down Under Challenge # 4.
For this challenge we had to use some 'Bling' and looking at the lovely Tilda images I have the other day, I immediately had an idea in my head of the sort of card I wanted to make so when I got home I set to work!


I chose my cardstock from my Stampin' Up! supplies and chose navy for the base card and two
different shades of blue for mounting the lovely sparkly paper onto.


The sparkly paper is from the Alison Ellis range which came out around Christmas time last year and I knew it would fit perfectly with this challenge.


I coloured Tilda in with watercolour pencils and my aquabrush then cut out the image and mounted it over the crescent moon then attached both to the patterned paper.


I then stamped the greeting and cut it out with my SU Window Punch and mounted it to the paper using 3D foam pads.


To finish off I added the compulsory 'Bling' - I used Kindy Glitz - Crystalline along the edges of the moon and the greeting and also on Tilda's hair bow, dress buttons and the pattern on her socks.


Here is the card I made -


It's very hard to see the overall effect in the photo so I have taken a side-on view as well to give you some idea of what it looks like but photos never do the cards justice - they look so much better in real life!


You can't see the beautiful glittery effect of the paper very well in these photos but it's really stunning paper and the glitter on the moon and Tilda doesn't come up as effectively either but I hope you get some idea of what I was trying to achieve with this card.


I hope to get some more challenges done tomorrow so check back again soon!

'Bye for now - thanks for stopping by.

Tuesday, March 24, 2009

Magnolia Blog Candy Giveaway


Hi there,

I have just come across a lovely blog called Pretty Pressings via Debbie P's Place and Rosa at this site is offering some fantastic Magnolia stamps for her Blog Candy Giveaway.

I have just joined the huge following of the lovely Tilda, one of the characters in the Magnolia range of stamps and have recently made my first card using Tilda in an Autumn Theme - click on my heading titled 'Down Under Magnolia Challenge' on my side bar to see the card I made for my first entry to that challenge.

Claudia at Pretty Pressings has created some gorgeous cards - take a look at her site to see what this talented lady has come up with ! I love her cards - the colours she uses are stunning and the images are wonderful.
(My wish list for this range of stamps is growing bigger every day as I see more samples of fantastic cards featuring Tilda and Edwin.)

Well, this is just a short post for tonight - I'll be back again soon, hopefully with some new cards for you to look at.

Thanks for stopping by - see you again soon !

Sunday, March 22, 2009

Happy Wedding Day - Photos and a Card

Hi again,

My partner and I went to a really lovely wedding yesterday. The bridal couple were former workmates of mine who had met at work and started a relationship which had this truly 'Happy Ending' or should I say 'Beginning' ?

It was a second marriage for both so it wasn't the traditional 'White Wedding' but it was actually one of the most colourful weddings I'd ever been too.

(The bride was the 'Hen' I mentioned on my blog a few posts ago when I told you about the 'Hen's Weekend Away' bus tour which I went on.)

The ceremony was held at the edge of a small lake in a Reserve close to the couple's home - the day was very sunny and warm and just perfect for the outdoor event.


The bride looked beautiful in a stunning red dress with matching jewellery and she carried a lovely bouquet of Gerberas, her favourite flowers.
There were quite a few laughs during the ceremony which was led by a Wedding Celebrant and also some tears as the emotional groom declared his vows before his bride and guests.

I think we all had a few tears in our eyes listening to his words - they were truly beautiful !


It was a real family affair as the bride was 'given away' by her two handsome sons who walked her down the path towards her waiting groom, his daughter was one of the bridesmaids (looking gorgeous in a yellow dress which looked fantastic against the colourful Gerberas) and his son and grandson were also in the bridal party.

Another lovely girl was the other bridesmaid and she was wearing a pretty dress in a lovely shade of Oyster Grey.


(Sorry about this photo but the sun was directly in front of us and it was very hard to get a good shot of the bridal party from the top of the stairs where all the guests were standing.)

Below is a photo taken from the bridge on the other side of the lake - you can see the happy couple and attendants on the decking and all the guests on the stairs coming down from the Rotunda.

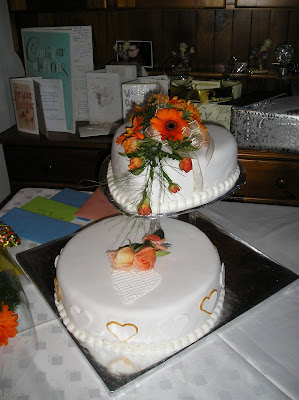
and lastly a photo of the stunning wedding cake -


The reception was held back at the couple's home and we all had a great night - I'm sure the happy couple had a wonderful day and will remember it for a long time to come.


Now, on to the card which I made for the occasion.

I used the SU Together Forever stamp set with Certainly Celery and Groovy Guava inks to stamp the floral image and the greeting.

I then punched out the floral image with the scallop circle punch and the greeting with the large oval punch and sponged around the edges with Certainly Celery ink.

I embossed the Whisper White card with my 'Birds & Swirls' Cuttlebug embossing folder then attached the stamped images with 3D foam dots and finished off the card with some lovely white and silver organza ribbon.

Here is a photo of the card I made - just a simple design but it worked out well.


And so, another weekend gone. Haven't done much today but relax and put up these two blogs.
Want to try to get some more cards done later tonight.

Please drop in again soon to see what my next creations will be.

Have a lovely day - see you all again soon!

Stitches & Craft Show - Melb. 14th March '09

Hello,

Last weekend I was working at our Stampin' Up! booth at the Melbourne Stitches & Craft Show. The show started on the previous Wednesday and ran through until the Sunday.

That weekend we had quite a few girls helping out at our booth and we had a great time.

We had demonstrations of different stamping techniques and 3D projects and met lots of wonderful customers who stopped by to look at our card samples and to have a chat with us and
some of them also tried our 'Make and Take' samples.

It was lovely to see the smiles on their faces when they had finished their little projects - some of them hadn't stamped before and really enjoyed themselves at their first attempt.


Here is a photo of our group of Demonstrators at the stand on the final day of the show -(photo courtesy of Simone Bartrum).


We had a lot of fun together, sharing our ideas and stamping tips and also shared lots of laughs during the day. A great group of ladies! (Yours truly is the last one on the right.)

Here are my card samples which I designed for my 'Make & Take' demonstration - I used various stamps from the Boho Backgrounds, Sincere Salutations and Polka Dots & Petals sets for this collection.


The sponged backgrounds on the 'sampler' piece of paper (on the lower right) were made using the 'negatives' of the Scallop Circle and Square punches after I had punched out the pieces for the other cards.


I designed the 'flower' card (at the bottom on the left) while I was at the show, using some scraps of SU printed paper leftover from one of the other girl's projects.

I just cut out a strip of the paper and also some 'leaves' using a circle punch to finish off this card.


The sponged edges on the scalloped circles and squares were made using Certainly Celery and Groovy Guava inks.

For the above two cards, I used the same inks for the background and greetings and stamped the spotted circle in Close to Cocoa ink.


To make the little scalloped panels on the bottom card, I randomly stamped flowers and the spotted circle in the three different colours then punched out panels using my square scallop punch. The panels were then attached with 3D foam squares to the base card.

It was just an idea I had at the show whilst I was 'playing' with the stamps and it turned out very well.


There's nothing like being surrounded by crafty people and other craft products to give you instant inspiration !!

I really enjoyed myself there and hope to do it again sometime in the future.

If you were one of the many visitors to our stand, drop me an email and let me know what you thought of our cards and 3D items and our presentations - my email address is at the top of my blog.


Well, that's it for now - thanks for dropping in!


See you next time :-)

Thursday, March 19, 2009

Inskpirations Challenge # 5


Hi there,

Well after a busy weekend at the Stitches & Craft Show in Melbourne I finally found a few spare minutes to create this card for Makeesha Byl's Inkspiration Challenge #5.


Here is the card I'm entering.


I used the SU Embrace Life set with Night of Navy, Soft Sky and River Rock inks, stamping the flowers and branches around and over a central sponged oval then added some bling with adhesive rhinestones and finished it off with some pale blue ribbon.


Hope you like it - with the busy week I've had it was the only challenge I could manage so far but have a few to do on the weekend.


Thanks for visiting - come back again for another look see very soon!


'Bye for now.

Saturday, March 7, 2009

Christening Cards

Hello again,

Today I went to a double Christening in my family - no, not twins but cousins Riley and Lillielle. The babies were born a few months apart so their parents decided to have both babies Christened on the same day.

It was a lovely ceremony in the grandparents' home with family and friends attending.
Our family is multi-cultural and this was a traditional Russian Christening which was conducted in both English and Russian and was a new experience for the Aussie members of the family and their friends.

All went well until the actual Baptism of water - poor little Riley (the older baby) didn't much care for going through that bit, especially in a room full of people looking at him!

Lillielle faired much better and took it in her stride.

It was a long ceremony and both babies did really well to get through it with just a few tears but after it was over, a quick feed and then they were off to bed for a well deserved sleep while the guests ate lunch.

I was going to make the Christening cards last night but it was late and I was feeling very tired so got up this morning to make them.

(I find that I do my best work when I'm under pressure and usually find myself making cards for special occasions about half an hour before I leave for the event! )

Am I strange or do other cardmakers do the same thing ?

Here are photos of the presents I gave the babies -

and the two cards I made.


Strangely enough, I decided to 'Christen' my Cuttlebug 'Swiss Dots' embossing folder for these cards - I'd bought it late last year but hadn't tried it out yet. I was very pleased with the result.

I wanted simplicity for these cards and was going to add teddy bears but while sorting through my tin of die-cuts, I found these lovely doves and thought they were perfect for this religious occasion.

I used SU cardstock for the base card and the greeting ovals and the 'With Love' stamp which was from our recent Sale-a-Bration promotion.

The insert pages were printed on my computer and I decided to add the babies' names and the date as a special touch for their parents to remind them of this lovely day.

SU Supplies :

Cardstock - Whisper White, Pretty in Pink, Bashful Blue
Punches - Small and large ovals

Extras:

Cuttlebug embossing folder - Swiss Dots
Ribbons
Die-cuts - Doves
Kindy Glitz - Crystalline (for the edges of the birds' wings, their eyes and on the little stamped hearts in the greeting)

It was a lovely day and a good time was had by all.


Well, that's it for today - will be back again soon with some more creations.

Thanks for dropping by! See you again soon.

Friday, March 6, 2009

Color Throwdown # 32


Back again with another challenge entry as promised - this is the current week's challenge from Color Throwdown.

I just love making pretty cards so was really happy with these colours. I got out the cardstock in the three SU colours then went through my SU Designer Series papers and found one that matched perfectly.

Here is my entry for the challenge -


I used the Regal Rose for the base card, mounted some Spring Flowers DS paper onto Pretty in Pink card and wrapped some pink satin ribbon around this piece before attaching it to the base card.

I then embossed a strip of Barely Banana card using my Cuttlebug 'Floral Fantasy' folder and mounted this over the patterned paper and ribbon.

Then using the SU small and large oval punches, I punched two ovals for the greeting - the larger one in Regal Rose and the smaller one in Pretty in Pink. The 'Dream' greeting was a rub-on from the Eastern Elegance pack.

To finish off the card, I searched through my container of flowers and found some lovely pink and pale yellow ones to match. I attached some adhesive pearls to the centre of the pink flowers and some small gold brads to the yellow ones then mounted all of them onto the card using SU Dimensionals.

Some lovely pink rhinestones added to the greeting and a little ribbon bow, and the masterpiece was finished !

SU Supplies -

Cardstock - Regal Rose, Pretty in Pink, Barely Banana

Paper - Designer Series - Spring Flowers

Rub-ons - Eastern Elegance

Punches - Small and large ovals

Extras -

Pink Satin ribbon, pink and pale yellow flowers, adhesive pearls, small gold brads, pink rhinestones, Cuttlebug embossing folder.

Looking forward to next week's challenge from Color Throwdown.

In the meantime, I have a couple more challenges to take up over the weekend so come back again to see those cards.

Thanks for checking in - see you again soon !


Color Throwdown # 31


Hello everyone,

Another day, another challenge ! I just missed the deadline on this Color Throwdown one but thought I would show you what I created.

The challenge was to use SU Colours - Bashful Blue, Kiwi Kiss and Night of Navy and as we
don't have Kiwi Kiss here yet in Australia, I substituted some DS paper with a print in So Saffron for this colour.


I embossed the Bashful Blue card then wrapped a cream/gold ribbon around it before attaching it to the Night of Navy base card.

I then cut a piece of Le Jardin DS paper (florals) and navy card and punched a scallop edge on each with the SU Scallop Border punch then mounted them over the ribbon and embossed panel.

Using another piece of the DS paper (So Saffron print) and some more of the navy card, I punched a scallop circles of each with the SU punch, backed the printed circle with the navy one and positioned it to give just a hint of a 'shadow' .

I then applied a rub-on greeting and some flowers to the front and then attached it to the card using SU Dimensionals.

To finish off, I attached a small ribbon bow and some pearls.


SU Supplies:

Cardstock - Night of Navy, Bashful Blue

Paper - Le Jardin (Designer Series)

Punches - Scallop Border, Scallop Circle

Rub-Ons - Eastern Elegance


Extras:

Ribbon, adhesive pearls.


I managed to make another card for this week's challenge - check out my next post for that one.


Thanks for dropping in to see my latest efforts - hope you like them.


Come back again soon!


Thursday, March 5, 2009

Birthday Card

Hi there,

In my previous post I showed you my first 'Tilda' card which was an entry in the 'Magnolia Down Under Challenge'.
I used a panel of embossed metallic bronze card on that card and as I had another piece left, I decided to emboss that too and use it in a special card for my Mother-In-Law's Birthday.


I mounted this piece on some SU Close to Cocoa card which had been punched along the edges with my SU Scallop Border punch. Then I attached a piece of cream/gold ribbon to the side. and mounted the whole piece onto SU Very Vanilla base card.


I added some lovely cream flowers and some pearls then rounded the corners of the card and used my Gold Leaf pen to 'ink up' the sides of the card to finish it off.


For the greeting I used an acrylic sticker which was a perfect match to all the other elements.


SU Supplies:

Cardstock - Very Vanilla, Close to Cocoa


Other supplies:

Cuttlebug Embossing Folder - Leafy Branch

Kaisercraft - Self Adhesive Pearls

Cream Flowers

Cream/Gold ribbon

Acrylic sticker


Well, thanks for stopping by - I have another two cards to show you in my next post.


Come back tomorrow to have a look at them - they are my latest entries for this week's Challenges.


'Bye for now.


Tuesday, March 3, 2009

Down Under Magnolia Challenge # 1


Hi there,

I'm back - sorry I haven't posted for awhile but I've been busy with work and the last few weekends have also been busy with social events so haven't had much time to sit and create but I finally managed to do one challenge last night.

It was a welcome respite and some great therapy for a thumping headache which I had after a frantic day at work!

I have entered the first challenge from Down Under Magnolia Challenges created by two of my lovely friends Kellie Winnell and Debbie Pamment. Both of these ladies love the Magnolia stamps and out of that love, decided to create their own weekly challenge for others to play along.
They are joined by Kristy Young on their Design Team - these three ladies are very talented so please take some time to visit their blogs if you haven't already done so.


This first challenge was an Autumn theme and required the little girl Tilda and the colour Red to be used. I started playing around with my Stampin' Up! cardstock, found the perfect combination to go with a piece of Brushed Bronze card that I found lying around my house and with a stamped image of Tilda, set to work.


I embossed the metallic card using my Cuttlebug 'Leafy Branch' embossing folder and adhered it to some Real Red card which had been punched along one edge with my SU Scallop Border punch. The Autumn leaves were made with a small punch then I dry embossed the veins with an embossing tool.

I coloured in the Tilda stamp using some watercolour pencils and an aquabrush - my favourite method of colouring.
Tilda and the park bench were then cut out and positioned over the embossed panel using 3D foam dots.

I also adhered the falling leaves with the 3D dots.


Stampin' Up! Supplies:

Cardstock - Close to Cocoa (base card) and Real Red

Stamp - Celebrate Everday set - (Greeting)

Scallop Border Punch

Extras:

Magnolia Stamps - Tilda with Heart, Park Bench

Cuttlebug Embossing Folder - Leafy Branch

Watercolour Pencils / Aquabrush

Oak leaf Punch


Well, that's it for tonight - thanks for stopping by. I'll have more for you in the next day or two.

'Bye for now.